How it works…
There is more you can do with Gluster. First, volumes have multiple options when you create them, each offering options for replication and distribution:
- Distributed: When using distributed volumes, files are randomly distributed across the bricks in the volume. This type of volume is useful when the need is to scale storage, and redundancy is not necessary or is already provided by other hardware or software layers. However, it is important to note that disk or server failures can result in significant data loss, as the data is spread randomly across the bricks in the volume. An example command to build a distributed volume is the following:
gluster volume create data1 gluster{1,2}:/data/glusterfs/volumes/bricks/data1
- Replicated: Files are copied across bricks for HA in replicated volumes. An example command to build a replicated volume is the following:
gluster volume create data1 replica 2 gluster{1,2}:/data/glusterfs/volumes/bricks/data1
- Distributed replicated: Distributed files across replicated bricks in the volume for improved read performance, HA, and reliability. When creating a distributed replicated volume, the number of nodes should be a multiple of the number of bricks. An example command to build a distributed replicated volume is the following:
gluster volume create data1 replica 2 cluster{1,2,3,4}:/data/glusterfs/volumes/bricks/data1
- Dispersed: This volume type utilizes erasure codes to efficiently protect against disk or server failures. It works by striping the encoded data of files across multiple bricks in the volume while adding redundancy to ensure reliability. Dispersed volumes allow for customizable reliability levels with minimal space waste. A dispersed volume must have at least three bricks. An example command to build a dispersed volume is the following:
gluster volume create data1 disperse 3 redundancy 1 \ cluster{1,2,3}:/data/glusterfs/volumes/bricks/data1
- Distributed dispersed: Distributes data across dispersed bricks, providing the same benefits of distributed replicated volumes but using dispersed storage. A dispersed volume must have at least six bricks. An example command to build a distributed dispersed volume is the following:
gluster volume create data1 disperse 3 redundancy 1 \ cluster{1,2,3,4,5,6}:/data/glusterfs/volumes/bricks/data1
When adding bricks to any volume, you can put more than one brick on a Gluster node. Simply define the additional brick in the command. In this example, a distributed dispersed volume is created, by putting two bricks on each node:
gluster volume create data1 disperse 3 redundancy 1 \ cluster{1,2,3}:/data/glusterfs/volumes/bricks/data1 \ cluster{1,2,3}:/data/glusterfs/volumes/bricks/data2
Volumes can be stopped with the gluster stop volume volumename command. An example to stop the data1 volume is the following:
gluster stop volume data1
You can also add bricks to a volume to grow it. This can be done after a new node is added to the cluster. In the following example, gluster3 was added to the cluster with the gluster node probe gluster3 command first. Then, data1 was grown with the following command:
gluster volume add-brick data1 gluster3:/data/glusterfs/volumes/bricks/data1
Note
When adding bricks to a volume, make sure you add the required number of bricks. Volume types such as distributed replicated volumes will need more than a single brick added.
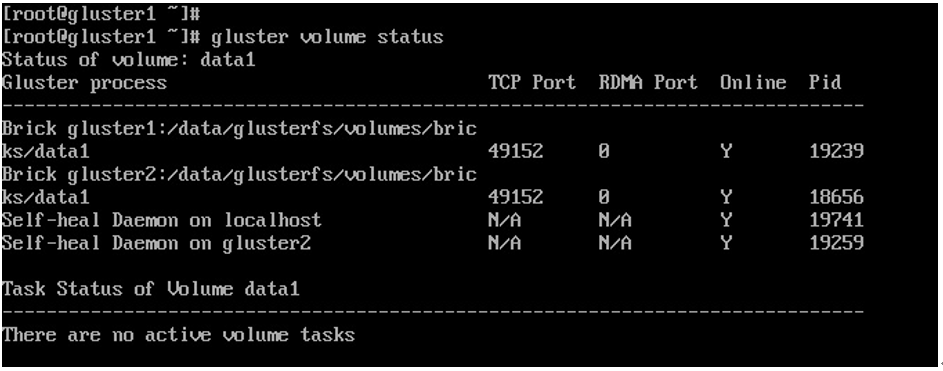
You can also check the status of all volumes with the following command:
gluster volume status
An example is seen in the following screenshot:

Figure 6.24 – volume status
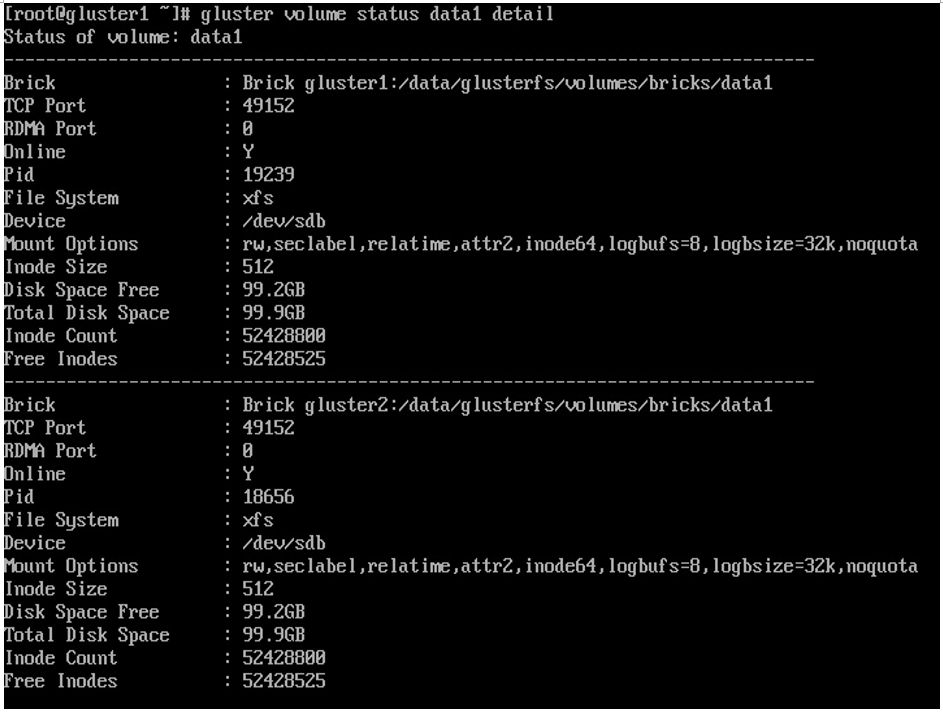
You can see the summary for a single volume by adding the volume name to the command. You can also see more details by adding the detail option. These can be combined, as seen in the following screenshot:

Figure 6.25 – Volume details
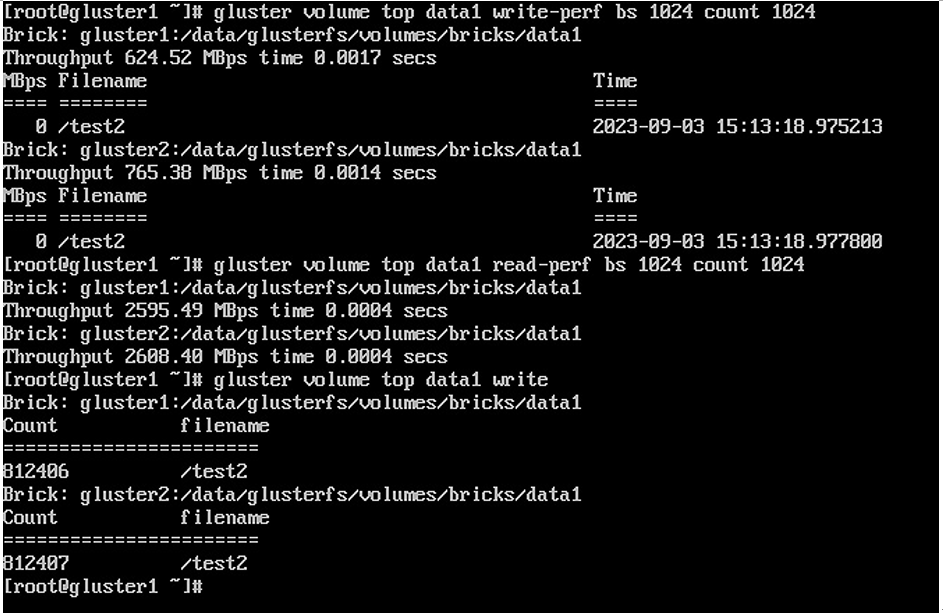
If you want to see performance information about a volume, the top option can be used. This will show what bricks are being used for read/write activity as well as I/O throughput to each brick. The basic command is gluster volume top volume_name option, with volume_name being the name of the volume and the options being as follows:
- read: This shows the highest read calls for each brick, as well as the counts.
- write: This shows the highest write calls for each brick, as well as the counts.
- open: This shows what bricks have open file descriptors.
- opendir: This shows what bricks have open calls on each directory, as well as the counts.
- read-perf: This shows read-performance throughput by brick. Run using the options bs (for block size) 1024 and count 1024.
- write-perf: This shows read-performance throughput by brick. Run using the options bs (for block size) 1024 and count 1024.
Several examples are seen in the following figure:

Figure 6.26 – volume top examples
Volumes can also be deleted. This is done with the gluster volume delete volume_name command, where volume_name is the volume being deleted. As a note, when deleting volumes, don’t forget to use the rm command to delete the bricks from storage.
