To do this, head over to https://linux.oracle.com and click the Sign In button:
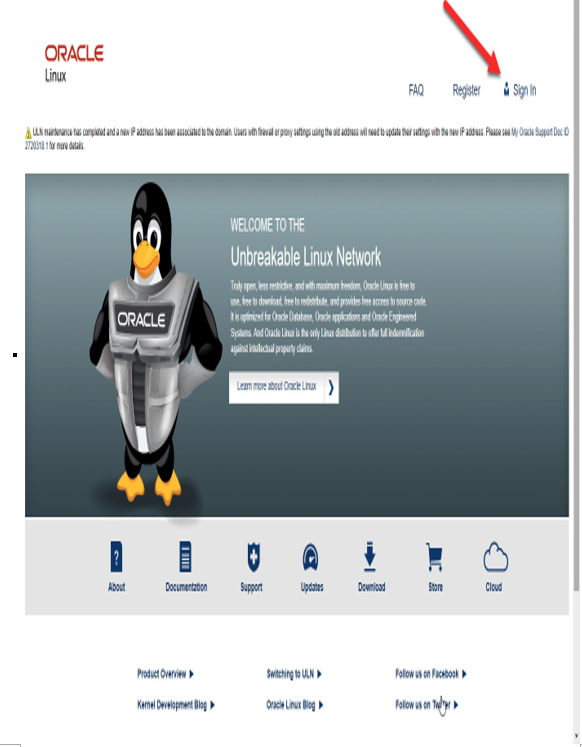
Figure 5.18 – ULN main page
When managing the server, use the same login used to register the server.
11. Once you are logged in to ULN, you will see all the servers registered to your account. You will also see what channels have been recently updated and added to the system:
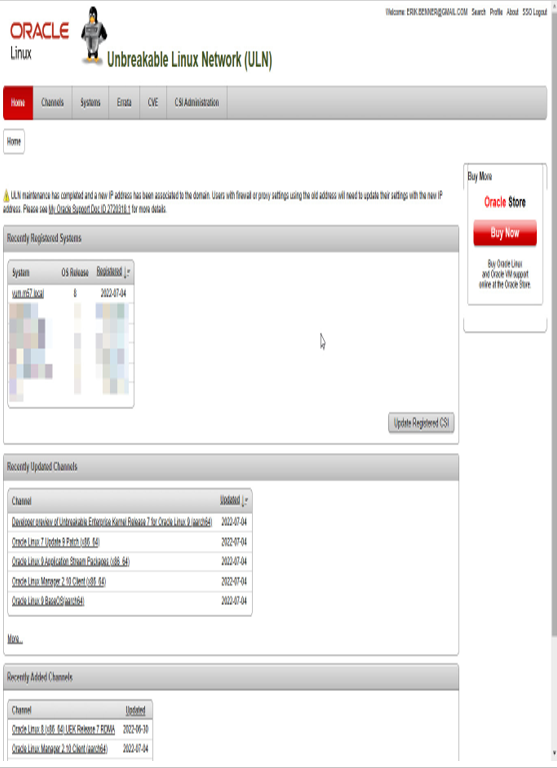
Figure 5.19 – Managed servers
12. From here, we need to promote a server to be a YUM repo. This will tell ULN to allow this server to have any channel assigned to it, allowing it to download RPMs not required by the specific servers. This includes patches for different major versions of Oracle Linux, different CPU architectures such as AArch64, and special patches for platforms such as Exadata. To do this, click on the server name, and then the Edit button:
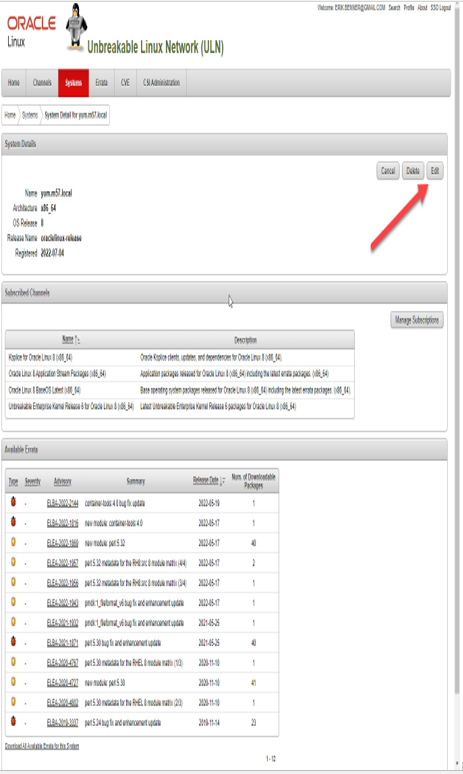
Figure 5.20 – Editing the server
13. On this page, we will update the server properties to make it a YUM server. Select the Yum Server checkbox and then click Apply Changes:
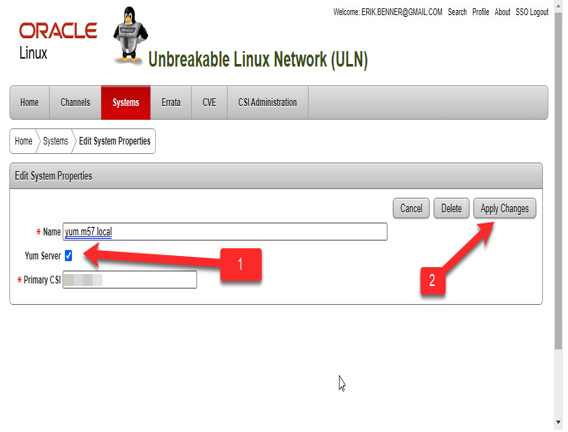
Figure 5.21 – Making it a repo
14. Next, we need to assign additional channels to the server. This will allow the server to serve up any channel it is subscribed to. To manage the RPM channels that contain a grouping of related RPMs, click the Manage Subscriptions button:
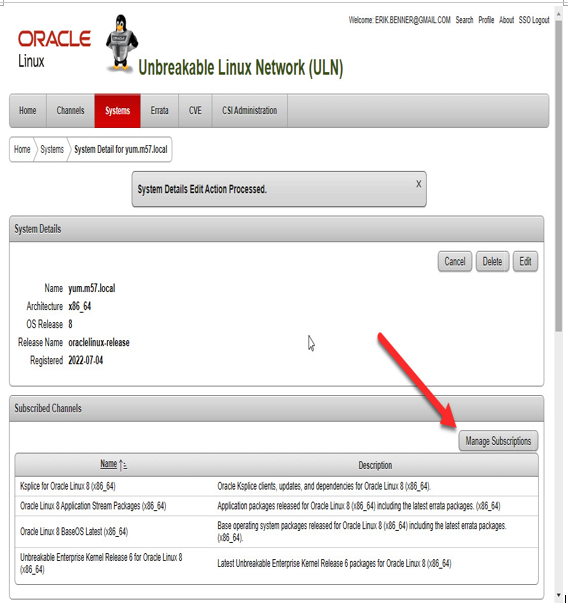
Figure 5.22 – Manage Subscriptions
15. Next, you will see all the available channels on the left and the channels assigned to the server on the right. While you can bulk-select all channels, it is better to only select the channels you need. In this example, Oracle Linux 8 Addons x86_64 is being added. You can also add channels for a different major release number, such as Oracle Linux 7. When selecting a channel, make sure to select the < or > symbol to subscribe to or unsubscribe from the local server. This is seen in step 2 in the following figure. Also, once you are done with the selection, you must click on the Save Subscriptions option to update the subscription. Exiting without saving the subscription will cause any changes made to be lost.
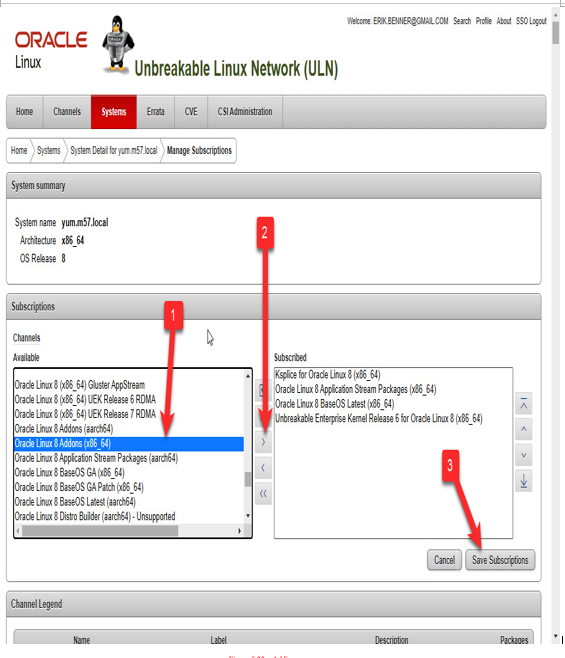
Figure 5.23 – Adding more repos
Note
When adding channels, only add what you need to conserve space and bandwidth. You can easily download a few terabytes if not careful. Also, the archived channels can be very large and are normally not needed for most sites, as they contain older releases. Expect multiple terabytes of disk space if you start using these channels locally.
16. Make sure you see the Subscriptions saved message:
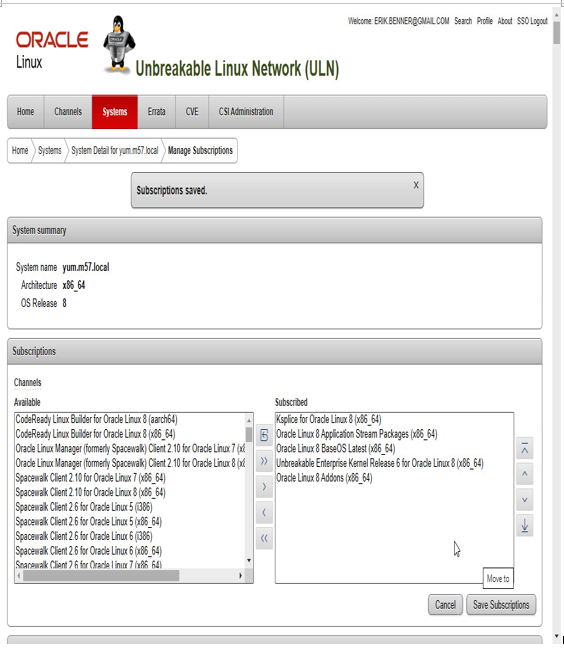
Figure 5.24 – Saving the config
Now, we finally have that local repo set. Next up is to run the uln-yum-mirror command as root, and the repo will start to sync. This process can take several hours, depending on your internet speed and how many channels you are subscribed to. The system will also run daily automatically, keeping your local copy current.
Note
When doing your first sync, watch your disk space closely. You may need to add more space quickly the first time. If this happens, add the space, and manually restart the uln-yum-mirror command.
When you finish a manual run, the script will let you know how much data was copied for each repo:
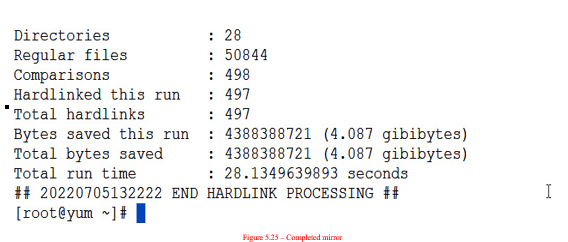
Figure 5.25 – Completed mirror
Once configured, the system will automatically synchronize your local repository with ULN. As you add new channels, they will automatically be downloaded when the cron job runs.
